Feb 27, 2013

Uncharted Territory...

I try to be a very healthy person. I try to stay active. I eat crazy healthy foods-mostly organic and local and whole. I juice. Of course, there are vices. I luurve doughnuts. And I do like beer and wine. The husband has been even brewing his own beer. (Yum!)

Anyway, to supplement my overall well-being, I've decided to take another step. I had heard about personal genome sequencing a few years ago, but it was pretty expensive. Well, as you might expect over the course of a few years, technology has improved, and the price has decreased. So I thought now is the time to try it.


This company will map your DNA and share all kinds of information with you.  They can give you insight on your ancestry and family lineage.  They can also shed some light on what traits your DNA might give you, or health risks associated with your genes.  It's pretty cool, and I'm really excited about it.  All you have to do is spit in a tube and mail it back. Easy peasy.

My husband and I both did this.  We get our results in six to eight weeks, and I'll share a bit about what I learn once we have them!


Feb 23, 2013

52 Weeks of Felting - Week 8

Happy Weekend everyone!!  This week's project is a cupcake!  Except, I couldn't stop at just one.  There are so many flavors colors to choose from, so I had to make a lot of different options...


I made one of these last week for a coworker's birthday, and it was a big hit.  Also, this was not my original idea.  Remember a few weeks ago when I said if I use your idea for my 52 Weeks project, you'd get a free one?  Well, my friend Mari is now the proud owner of a new cupcake--after she picks her flavors colors, of course.


These were so much fun!  You can purchase one here in my shop, and they will be 25% off until next Saturday!

I'm thinking about making some more food items....what do you think?

Feb 20, 2013

My Craft FAIL and Paint Your Own Pillow Cover DIY

So, this is an unplanned blog post.  Maybe you're asking, "but, Dani, how do you not plan a DIY project?" Good question.  And the answer involves an embarassing admission.  I had a major craft FAIL.  I mentioned in this post, that I was going to make my own (less profrane) version of this pillow.  Well I did.  And it turned out great.  I was super proud of my new pillow. But, you know when you look at a particular word or two for a really long time, the words start to look funny. Well, I blame that for my craft fail: I spelled DIEM wrong, and I didn't even realize it until the pillow was sitting on my couch for a few days:

Awesome.

But I really wanted that pillow.  So, I made another one, and decided to turn it into a tutorial for you guys.  So, if you want to make your own pillow cover (and obviously, you can choose any phrase or words your little heart desires), this is what you'll need:

Supplies:
Fabric*
Print out of your chosen words
Scissors
Chalk or Erasable Fabric Marker
Pins
Tape Measure or Ruler
Permanent Fabric Marker
Permanent Fabric Paint
Paint brush
Cardboard and clips
Sewing machine

*My pillow cover is for a 15 inch square pillow, so my fabric is 15 x 36 inches.  With this size, I have a half inch seam allowance for the width to make my pillow cover slightly smaller (14 inches wide) to make the pillow nice and full.  The length of the fabric is not set in stone, but you want at least six inches more than double your pillow cover width. (So in this case I want 14 x 2 + 6 = 34.  Since I had a yard of fabric, I just went with 36.)


Step 1: Cut out your letters. (Mine look funny because my printer is apparently low on ink...)


Step 2: Mark the center of your fabric for reference.  Also mark where the top and bottom edge of your pillow will be. (So now I have marks at 11 inches, 18 inches, and 25 inches.)


Step 3: Using your reference marks, pin the letters onto your fabric.  It's also a good idea to clip your fabric to your cardboard at this point, so you have a steady backing for pinning and keeping your letters straight. Um, it's also at this point that you want to double check your spelling *ahem*.


Step 4: Trace your letters with the permanent fabric marker.  Then remove the paper.


Step 5: Paint your letters.


Step 6: After my letters were filled in, I used chalk to write out the handwritten letters, then the permanent fabric marker, then I made it bolder with paint.  Let your paint dry completely--a few hours will probably suffice.


Step 7:  Sew seams on the short ends of the fabric.  I chose half inch seams.


Step 8:  Place your cover right side up, and fold the ends as close to the top and bottom reference marks from step 2.  These folds will overlap.  Pin the sides together.


Step 9:  Sew the sides with a half inch seam allowance.


Step 10: Turn your pillow cover inside out and stuff it!


You're all done! (And hopefully yours is spelled correctly!!)  Enjoy!


Feb 16, 2013

52 Weeks of Felting - Week 7

Happy weekend, folks! I've come down with a cold, so I'm taking it easy today. But that won't stop me from felting...though it may have slowed the process a bit. So, this week's project brings us a leprechaun. Check him out:


Of course, I had to give him a pot of gold...


As always, this guy is available here in my shop for 25% off until next Saturday. :)

Thanks for stopping by! Oh, and did you see my giveaway?  There are five days left to enter. It's over on Julie Ann Art...go see!

Feb 12, 2013

Home Decor - Travel Wall

Last month, I mentioned I was redecorating my living room. We got a new sofa after not having one for at least six months--we sat in office chairs in our living room, because I could NOT find what I wanted. I wanted a lightish gray sofa, and something that could be easily cleaned. I searched for a while and nearly settled on outdoor furniture. Then we found two sectional pieces, in light gray leather, on SALE even, that worked really well for our space. SCORE!

But I digress. I don't really want to talk about my sofa today. I want to talk about what's on the wall above my sofa. I call it our Travel Wall. The Travel Wall includes items that we have picked up from our trips or represent a place we have been somehow.


I am enamored with traveling. I love each part of the process: deciding where to go, reading travel books, planning the trip, the butterflies in the weeks before we leave, experiencing new cultures, foods and languages, getting lost, meeting new people, returning home, going through mementos and pictures, and telling our stories, the good and ugly.  Since our 2008 honeymoon in St. Lucia, we have been fortunate enough to travel somewhere new every year.  We've been to London (and a few surrounding areas in England), Paris, all over Italy, Ireland and Scotland.  And we stayed stateside one year and went to Las Vegas, then to the Grand Canyon and a bit through Arizona.


So here is part of our new living space (and that's Kitty)! 


So, let me tell you a bit about what we have on the Travel Wall (because the best part is being able to share the stories)...


1. This is a print that we picked up in Northern Ireland at The Giant's Causeway.  Seriously, this was my favorite place to visit in Ireland.  It's a UNESCO World Heritage Sight and part of Northern Ireland's National Trust.  It is a piece of the coast that has naturally formed basalt stone columns that are beautiful. The place feels magical.

2. This is a print from this Etsy seller. It features a the streets of London as a map. I love getting up close and reading through it, remembering the places we visited.

3. Love this little cat.  It's an original watercolor that we purchased from a street artist in Siena, Italy.

4. This is a print from this Etsy shop. I have been lusting after Lucile's watercolors for some time now.  It's a map of Italy, on which Lucile has painted different regional Italian foods.  Needless to say, the food we had in Italy was ridiculously good.  And the wine....so much wine!

5. I love to have a map of the world in the house.  I love to use it for reference...and daydreaming...

6. This is a fun, stylized sheep on a tiny canvas that we picked up in Scotland at a handmade craft show!  I was so excited to find this little show--there were so many cute things.

7.  I used to have a larger world map, and these two pieces are sections cut from that map (the Caribbean and Europe.)

8. This used to be a reusable bag.  We went to the Grand Canyon in  2011 and have been using this bag ever since, until just recently when the handle started to tear.  So, I decided to cut out the panel and frame it!

We also picked up some fun coasters in Ireland, and I like to display one or two of my favorite photos from our trips.  Below you can see a photo of the gargoyle's view of Paris from Notre Dame Cathedral. 

Oh, and do you see the books on the table?  We may or may not be planning another trip....(EXCITED!)

How do you like to remember the places where you've been? 

Feb 9, 2013

52 Weeks of Felting - Week 6

Happy weekend!  I don't have too many things planned for my weekend...there are a couple orders to work on, some friends coming over tonight, maybe a visit to an antique store.  I'll squeeze a run or two in there also.  I'm happy to report that the 5k training is going nicely, and the tattoo fund is growing. Oh, and the husband talked me into registering for a 15k trail run in October.  I'm not sure what I was thinking--but he's a pretty sweet talker....so, yeah. 

Anyway, week six of my felting project brings us a panda!  He's sleepy.


You can find him here in my shop for 25% off until next Saturday! Have a great weekend!

Feb 6, 2013

DIY Map + Corkboard = Shop Sales Map

Hi guys! I have a fun project to share with you today.  Backstory: my little shop keeps growing, and I thought it would be really interesting to keep track of where I ship my products.  So, I decided I needed a world map/corkboard so I could mark those places with pins.  Map/corkboards aren't easy to find.  So I made one--and you can too!


You'll need...

A map (you can find inexpensive maps on Amazon)
A piece of lightweight plywood
A roll of cork (or two depending on thickness--available at Lowe's or Home Depot)
Liquid Nails (or another heavy duty adhesive)
Caulk Gun
Spray Glue
Tacky Glue (optional)
Pen
Pencil
Scissors
Small sponge brush
Saw Tooth Picture Hanger
Map Pins

Step 1: Either cut your map to the size of you plywood, or vice versa.  I chose to cut my map, since it was a little large and had a border with flags that I didn't need.  I centered the plywood on the map, traced, and then cut it out.


Step 2:  Cut your cork to size.  I traced around the wood onto my cork. The cork that I had was given to me by a friend.  Cork cracks easily, so take care when cutting. You can find cork Contact Paper and other cork rolls at home repair stores like Lowe's or Home Depot.  Depending on the thickness, you might need two rolls.


Step 3:  Glue the cork to the plywood.  I used Liquid Nails to adhere the cork to the wood.  I spread the liquid nails around with a sponge brush, which you should wash immediately if you plan to use it again.  After the entire piece of plywood is covered in adhesive, carefully press the cork down.  I set another piece of heavy wood on top and let the Liquid Nails dry for 24 hours.


Step 4:  Glue the map to the cork.  After the Liquid Nails dries, it's time to glue the map to the cork.  I used a spray adhesive for this.  I lined the map up with the cork and used binder clips to hold one side in place.  I coated the left side of the map with the spray adhesive, pressed it against the cork and used binder clips to hold it down. (Um, you should use the spray adhesive outside.) I did the same to the other side.  I also used a dab of Tacky Glue on each corner, for good measure.  Again, I set another heavy board on top of the map and let it dry for another 24 hours. 


Step 5:  Attach your picture hanger.  After your glue is dry, you can attach your picture hanger.  I chose a saw tooth hanger, which was simply nailed into the plywood/cork.  Measure and mark the halfway point of your board and attach accordingly. Make sure that the little nails or screws aren't long enough to poke through your map.  I also gave each nail a little dab of Liquid Nails just to make sure the saw tooth hanger was securely attached and very strong.


Step 6:  Pin your map!  Place your pins wherever you'd like to mark.  You could use this map to mark where you've traveled, or if you have a shop like me, mark where you've shipped your product! I just put one pin per location. 


Step 7:  Hang it up!  I also personalized my map with cute little cork letters that you can get in the scrapbook section of craft stores. :)


So what do you think?  Could you use something like this in your home or for your shop?

Feb 2, 2013

52 Weeks of Felting - Week 5 - AND A Giveaway Winner

I decided to make another garden friend this week.  Meet Sherman the Snail.  I envisioned a cute snail with a shell that had a pop of color, so I mixed in some pretty blues, greens and yellow with the brown of the shell.  I really like the effect.


Oh, and that's Luna...she says "hi!" 

You can purchase this snail here for 25% off until next Saturday.

Now...I have a giveaway winner to announce!  I really enjoyed reading your "best Valentine's Day gifts."  Thanks for sharing!

Congratulations Beverly Lauzon!! You won the Valentine's Hippo!  Check your email!

Feb 1, 2013

The List-February

February: I've got plans for you! I'm so excited to be linking up with Erika at rouge & whimsy and Beth at dot in the city for The List.  The first Friday of every month, we'll be sharing our lists with you. "Lists of what?" you might ask.  Well friends, I've got a list of lists, so you'll be reading about what I'm currently obsessing over at the first of each month. I write lists like none other, so I'm sure my topics will run the gamut. 

Fitness Goals for February:
Photo
--Yoga class once per week
--Yoga/cardio/weight training class once per week (which is different than the above class)
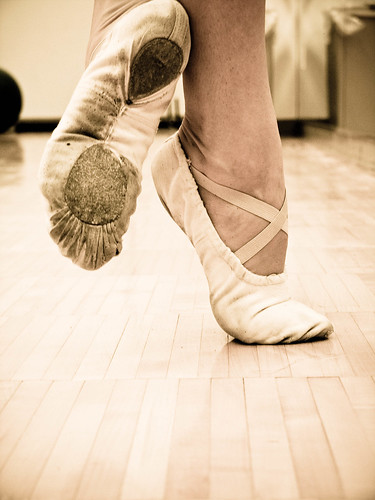
--Ballet class once per week
--This plank challenge at least five days per week
--Training for the The Color Run

Things to make:
--Seven pillow covers, including this one and my own (slightly less profane)  version of this one
--This cute felt heart bookmark by my friend, Holly

Recipes I have tried or want to try:

Orange Thyme Cherry Lip Tint
--Food Babe's Turmeric Cooler (delicious!)
--Peanut Butter Chocolate Quinoa Cookies
--White Bean Cakes with Roasted Winter Vegetables

Products/Shops I'm loving right now:
--My Erin Condren Life Planner
--This amazing Geometric Bear Brooch
--This shop's soaps and lip balms (LOVE!)


What would you add to your list?


Link up with us!

 photo TheListC_zpsc77b3f30.jpg